Earlier this week I received delivery of my copy of dampf’s new wargaming terrain guide (signed edition #19!), and having flicked through a few of the tutorials I’ve been heavily inspired to get on with my church. Within hours of having the book I had ordered myself some DAS modelling clay, which arrived today. Opening it up, this smells *very* familiar, so I can only surmise that I’ve used it before at school perhaps. I really like the texture of it though and I can see why dampf recommends it as it’s extremely easy to work and move into shape.
The evening began with some time in the sun after work, cutting out a platform for the church from a rather large sheet of 6mm MDF that I use for all my terrain bases. It’s a bit thicker than I want, but I’ll keep at it until it’s gone. Once this was done I cut out some corrugated cardboard templates roughly 5mm larger than the base of the church. These were glued together with a hot glue gun and are intended to help build up the floor for the church a little. My intention with this build, at least while creating it, is to build the entire interior of the church with the walls off, so I needed a good solid base to work within.
The next stage was to cut a piece of foam board for the raised platform for the altar, on this I spread a thinish layer of DAS modelling clay and careful smoothed it out, before marking in some stone tiles. It still looks a little rough, but my intention is to give it a light sanding/clean-up once its dry to remove all the bits that have lifted as I scraped the clay. The bit’s where the gaps have closed in are fine, as that can just be general wear and tear.
While that was drying, I moved on to make the roof trusses. I want to make the roof removable, so I want to create some detail under it, I know it won’t be seen much, but it’ll be fun to build. My plan is to glue some sheet balsa onto the trusses (mainly because I have it going spare), which I can mark wood panelling in to. This can then be reinforced by the tiles being glues to the back of it.
So the final photo show where we are now, with a blue-tacked together roof template and trusses, time to do a bit of painting before bedtime! I’ve just realised I was so absorbed tonight that I let my cup of tea go cold and I didn’t finish all my munchies, inconceivable!
")
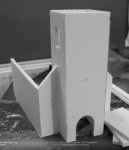
Altar floor in situ
")
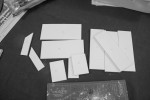
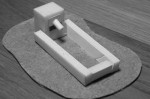
New MDF base and carboard platform
")
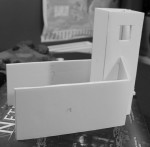
Church floor for altar
")
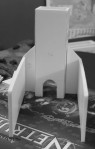
Bluetacked truses and roof template in place.
")
Another close up of altar floor.
")
New roof truses


")
")
")
")
")
")
")
")
")
")
")
")
")
")
")
")